
How to Insert Screw Together Grommets - A Hardware Installation Tutorial
6/11/2017 11:43:00 AM

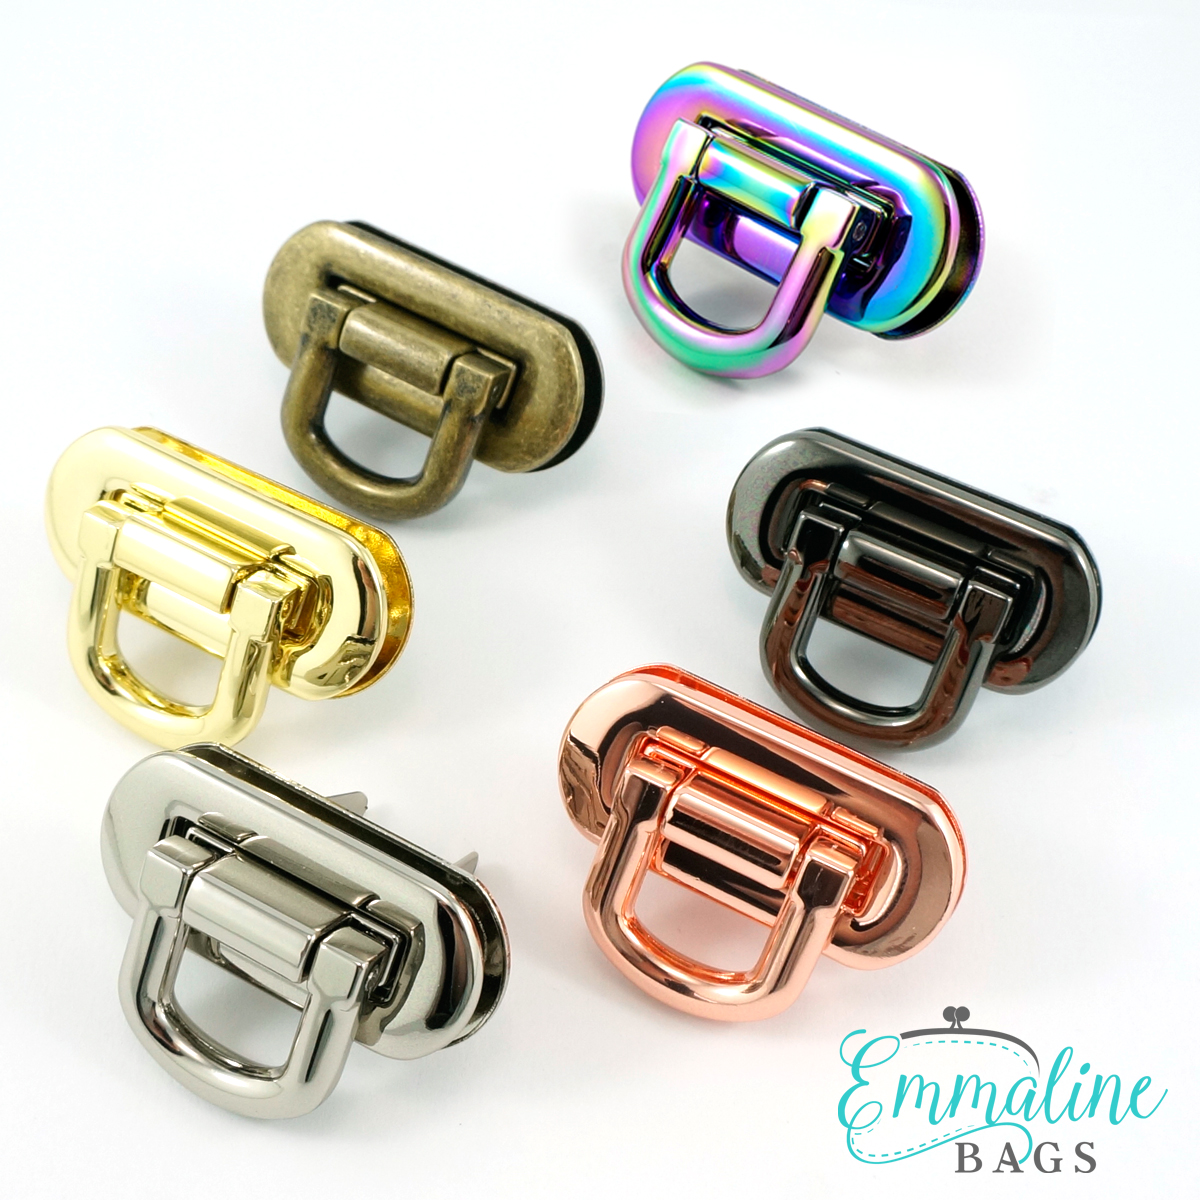
Grommets are one of my favorite pieces of hardware and although they can seem intimidating, they are super easy to install. With a few tools and tips, you can painlessly add them to your next bag in just a few minutes. Read on to learn how to install Emmaline Screw in style grommets.
Here's what you need:
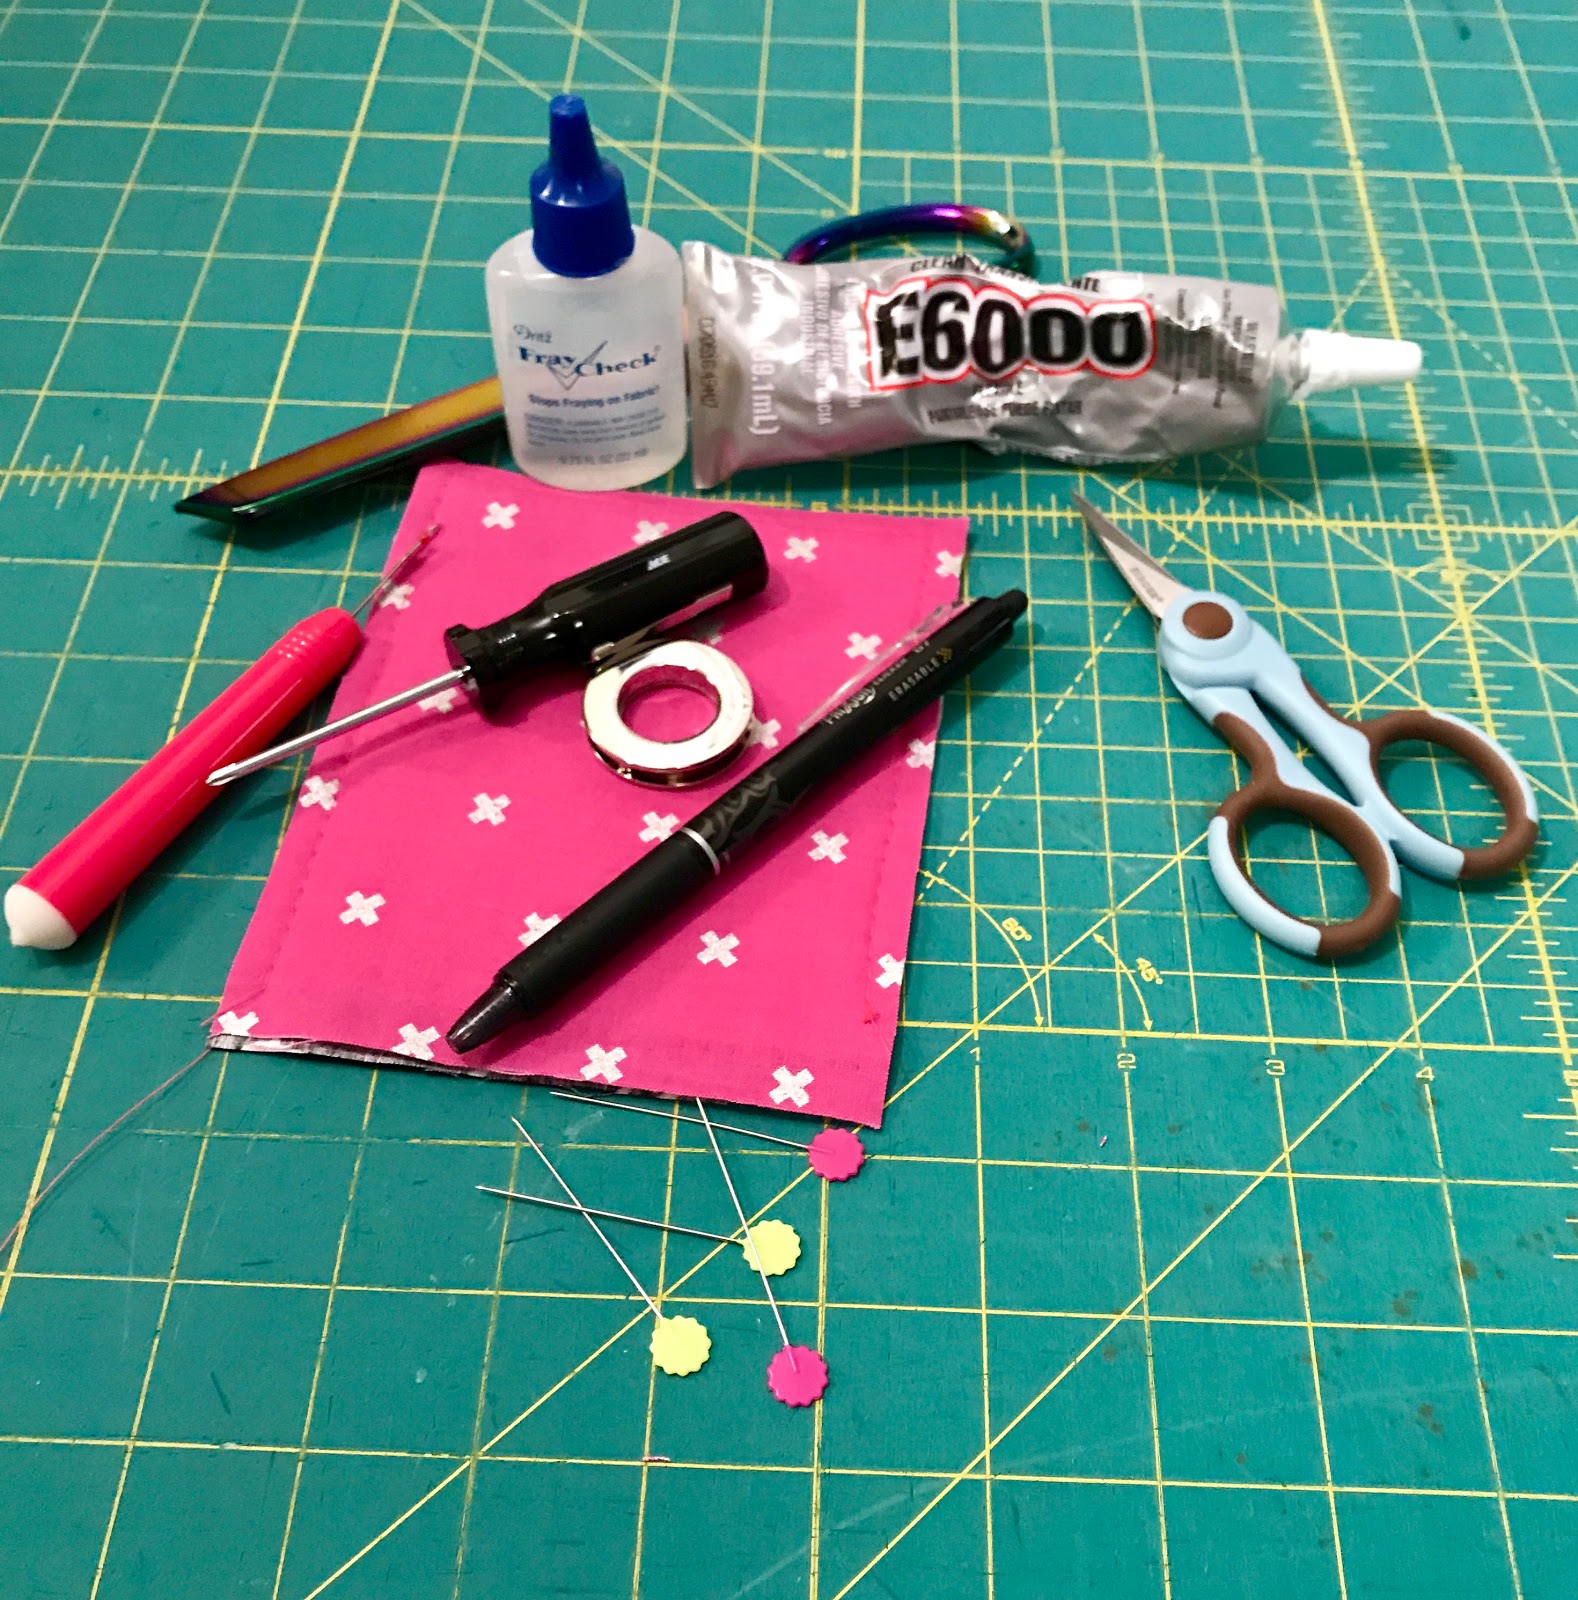
-Fray Check or similar fray blocker
-A strong glue or Locktite
-A seam ripper
-Sharp scissors (I like to use small embroidery scissors)
-A small screwdriver
-A few pins
-Your completed bag

Once you've determined your placement, unscrew the grommets. Use your marking pen to trace around the INSIDE hole of your grommet.

Once you have your hole traced, use your pen to draw across the center of the circle both vertically and horizontally creating an X.
Grab your pins and carefully pin around the circle through all the layers. You want to keep those layers from shifting as you cut out the hole. Then carefully take your seam ripper and cut across the lines you made. Tip: start at the edge of the circle heading towards the center, that way if you slip up you're not as likely to rip a giant tear outside of the circle.

Now grab your sharp scissors and carefully start cutting the outside of your circle.

Go slow, remember you can always cut more away but you can't add it back!

Continue cutting around the circle, periodically checking your fit to make sure you aren't getting scissor happy.

Once you are happy that your grommet sits snugly inside the hole (there should be no wiggle room), we need to mark and cut out a small notch for the screw holes.

Once you have it marked, you can either use a small punch to make your notches or cut them out with your scissors. Which ever you choose, remove the fabric carefully, we only need to take a tiny bit out where the screw holes are.

Slide your grommet in again to check for fit.

Nice and snug. When you are happy with your fit, grab your Fray Check and make sure that you apply a little to ALL your exposed layers (fabrics, interfacings and whatever else you have sandwiched in there.

The fray check helps keeps the fibers together so that there aren't tiny threads sticking out from under your grommet.

You can run an iron over your fray check if you are worried about any discoloration, but unless you applied it very heavily nothing will be visible once we attach the grommet.
Glue: For extra security, add glue to the fabric around the opening of the grommet, or both metal surfaces (front plate and back plate of grommet). Apply a very thin layer of a clear, tacky, quick drying glue meant for fabrics and metal, such as Quik Grip, Beacon 3-in-1, Gutterman or E6000. Also, add a small drop of glue or locktite to the screw holes to keep them secure.


Lay your grommet back on and add your screws. That's it! Pretty painless right? This is what your grommet looks like from the back:

And from the front:

You are all done! Admire your pretty new bag complete with grommets.


-----------
Photos and content provided and written for Emmaline Bags by Cyndi Farfsing, from The Nosy Pepper. Cyndi's blog is chock is full of more bag photos and make making tips. Check out her bag series "It's in the Bag! Better Bag Making Series," to learn a ton of new bag making skills.
Share your projects made from Emmaline patterns and/or with Emmaline hardware in our facebook group Emmaline Sewing Patterns Group, or on instagram with the hashtags #emmalinehardware, #emmalinepatterns, #emmalinebags, or tag us @emmalinebags.


0 comments
Note: Only a member of this blog may post a comment.