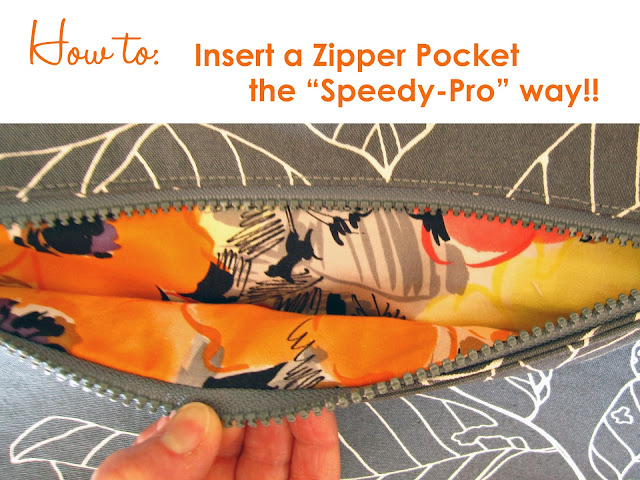
How to Insert a Zipper Pocket - Method 3 - Patty's Tutorial
5/04/2016 09:22:00 PM
Read the following tutorial and learn a very easy way to add a zipper pocket that involves no pinning, double-side tape, or glue, and removes any need for them! Get a professional zipper opening with no zipper tape edges showing.
Learn the pocket method and then stay for the extra tip at the bottom that shows you how you can turn your ENTIRE bag right side out through the bottom of the pocket instead of an opening in your lining.
A bit about Patty: Patty Cucman is an experienced bag maker from Calgary, Alberta and she makes most all of her bags to donate to a non-profit sale that is held every Autumn by the UJAMAA GRANDMAS. With the proceeds, this year the UJAMAA GRANDMAS hope to surpass 1 MILLION dollars donated to the Grandmothers Campaign. This is mostly from their fabric and yarn sale in April and handcrafts sale in October. Check out their website and see how you can shop the sale, donate products or maybe even join the Grandmas!
Patty's Lined Zipper Pocket Method - a Tutorial:
Measure the zipper to be inserted from bottom stop to the top of the zipper pull. Cut and interface a piece of fabric 2 1/2 inches (6 cm) wide and 2 inches (5 cm) longer than the zipper. This will be the facing for the zipper opening.
Press, turn and press again to create a nice uniform window opening. Set this part aside for a minute. So far this is all pretty normal for a zippered pocket.

Lay the prepared host fabric window that you set aside over the zipper with the pocket lining extending towards the top of the host fabric. Pin in place through the host fabric and the lining. No need to pin or glue the zipper.
Top stitch JUST THE BOTTOM of the zipper in place, backstitching at both ends. Depending upon the weight of the fabric you may not need to use a zipper foot.
Turn the whole package over so the pocket is facing you. Fold and finger press the lining down; the bottom edge of the zipper tape is now sandwiched between the lining and the window facing.
Fold the bottom of the lining up to meet the top of the window facing. Make sure the edges are even and pin this in place through all the layers.
Turn the work over and top stitch around the ends and top of the window from the right side and through the zipper and the lining. I like to backstitch at the beginning and end and I also do two backstitches before and after each corner. In this way, all four corners match and there is a bit of nice detail on each corner.
Unpin the pocket, fold the sides of the host fabric back and stitch up both sides of the pocket. Be sure to catch those little triangles in the stitches.
On the interfaced side, draw a line the length of the facing and 1 inch (2.5 cm) from the bottom. Now draw a second line 1/2 inch (1.25 cm) up from the first line. Lay the zipper on the lines and mark the ends of the zipper. Complete the rectangle.
Lay this facing on top of the host fabric with the interfacing and the lines facing up and the top line at the top of the desired zipper opening. Pin in place and sew around the box as you would for any zipper pocket construction. To get a nice fit, sew inside the long lines and outside the end lines. Shorten the stitch length at the corners for added strength.
Cut between the lines to about 3/8 inch (1 cm) from the ends. Now snip into the corners to create little triangles. Longer triangles are better than too short as you will want to sew through these triangles during final construction. Clip from both sides to get nice flat corners. Sometimes the weight of the host fabric prevents a nice close clip on both sides.
Press, turn and press again to create a nice uniform window opening. Set this part aside for a minute. So far this is all pretty normal for a zippered pocket.

Working with the pocket fabric, lay the zipper on one end of the fabric and baste it in place along the edge and 1/8 inch (3 mm) from the edge of the zipper tape.
Lay the prepared host fabric window that you set aside over the zipper with the pocket lining extending towards the top of the host fabric. Pin in place through the host fabric and the lining. No need to pin or glue the zipper.
Top stitch JUST THE BOTTOM of the zipper in place, backstitching at both ends. Depending upon the weight of the fabric you may not need to use a zipper foot.
Turn the whole package over so the pocket is facing you. Fold and finger press the lining down; the bottom edge of the zipper tape is now sandwiched between the lining and the window facing.
Fold the bottom of the lining up to meet the top of the window facing. Make sure the edges are even and pin this in place through all the layers.
Unpin the pocket, fold the sides of the host fabric back and stitch up both sides of the pocket. Be sure to catch those little triangles in the stitches.
Done in a minimum of steps and nice and neat inside the pocket!
Patty's tip for turning the bag through the pocket instead of an opening in the lining:
If you are turning your bag through the pocket, you can use two pieces of fabric for the lining and leave the bottom open or you can just cut the bottom off. If you are going to cut off the bottom, sew to within 1/8 inch of the fold and backstitch to be sure the seam is strong enough for the turning step.
I sincerely thank Patty for taking the time to write up this tutorial. It never ceases to amaze me how the bag makers continue to help, support, and inspire each other.
If this post was helpful to you, let me know with a comment.
Thank you for reading,
Janelle
emmalinebags.com
 |
| Click here to sew eye-catching clutches! Learn More! |


12 comments
I had to read this a couple of times before I got the idea of how it works. I am now eager to try it. Looks so simple and professional. Thank you Patty
ReplyDeleteThank so much for all the information! This explains this pocket process in a way I could understand. I'm sure this is what I'll do from now on! And I love turning through the pocket bottom! That is how I always turn now! What fun! Vernita
ReplyDeleteI wasn't sure what host fabric meant until read it a few times but in the end I finally got it. It's great nice and neat.
ReplyDeleteI wasn't sure what host fabric meant until read it a few times but in the end I finally got it. It's great nice and neat.
ReplyDeleteYou given a clear and simple instruction. It's easy to use for those who knows the sewing, but untrained people also can try by reading your instructions.
ReplyDeletehttp://newbagonline.blogspot.com/
This is great and I can't wait to try it. Thanks so much.
ReplyDeleteThank you. I knew there had to be a better way!
ReplyDeleteI am looking forward to trying this! Thanks to Patty for this fine tutorial!
ReplyDeleteThis comment has been removed by the author.
ReplyDeleteHi Janelle, have just found your blog and love your bags and very handy hints. I also found your reference to a nickel script bag label but they don't appear to be in your store. Do you still stock these?
ReplyDeleteHi there, we don't stock those at the moment. I am in the process of redeveloping that product so that it is more user friendly. Thanks for reading along! Glad to have you with us!
DeleteBrilliant and I can't wait to try it!
ReplyDeleteNote: Only a member of this blog may post a comment.